Kodi How to Add Addons the Right Way. Make sure your addons will work and update long-term by learning the proper way to install them.
We answer a lot of questions on social media where the solution is that users aren’t installing Kodi addons right. So check out our Kodi how to add addons guide below and make sure you are doing things the right way.
First off, never use Superrepo. They downloaded and recompiled Kodi add-ons in their own repository. Addons might take 5 seconds less time to install but you won’t have the developer’s official repo which leaves you prone to missing updates and not installing all dependencies required for each addon. If you’ve never heard of Superrepo before, keep this is mind for when you do.
The correct way to install Kodi addons is directly through the official developers repo so you know that as soon as they update, you will receive an update. Some wizards choose to link to the official developer address for addons which is fine in theory but other wizards don’t do this and it’s hard to differentiate the good and the bad.
Without further ado, here’s the best and official way to get any Kodi addon.
Kodi How to Add Addons
- ON Kodi 17 Krypton Only: From the main menu, click Settings > System Settings > Add-ons > Turn On Unknown Sources > Click Yes.
- Back from the Kodi main menu, click on SYSTEM
- Click on File Manager
- Click on Add Source
- Click on <None>
- Type in your repo address here. All of the guides on KodiTips.com have the official repo address in them. When you are done typing the address, click doen.
- Scroll down and click Done at the bottom of the window
- Highlight the box underneath and click on it.
- Enter a name for this repo you like (it can be anything) and then click OK.
- Go back to your home screen.
- If you are on Kodi 17 Krypton: Select Add-ons > Add-on Browser. If you are on Kodi 16 or earlier: Select SYSTEM > Add-Ons
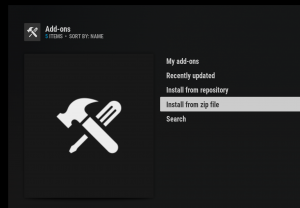
- Select Install from Zip File
- Click the repo name you installed above in step 9.
- Now you are looking for a repository zip file. It is usually called repository.reponame-x-x-x.zip where reponame is the name of the developer and x-x-x is the version number of the repo. When you find it, click on it and wait for the enabled notification to appear in the corner.
- Click on Install From Repository
- Find the repository that just installed above in step 14
- Navigate into Video Add-ons (or Program Add-ons if its a utility you want)
- Find your Kodi add-on and click on it.
- Click Install and wait for the add-on enabled notification again.
And that’s it! Trust us when we say this process only takes a minute to complete. Once you do this once or twice, it all becomes very routine and you’ll be an expert.
That’s our Kodi how to add addons guide. Let us know on Twitter or Facebook if we can help you out!
PROTECT YOURSELF ON THE INTERNET
Sign up for a premium Kodi VPN and access the internet unrestricted. We offer exclusive discounts for IPVanish and NordVPN, the highest respected VPNs in the Kodi community. Both of these VPNs have some great features for users:
Apps for Android, iOS, Mac, Linux & more
Zero Logs
Unlimited bandwidth
Tier 1 hardware (no speed slowdown)
Access to servers hundreds of VPN servers


After I hit install from zip file it’s nothing there
My screename wentry blank help
Hey there … Excellent brief article and so informative. Nice to observe your website.
My Weblog
Select Install from Zip File – I do not find ‘install from zip file’. i have kodi loaded but do not find the magical button to install. Need help please.
So, for each add-on I install, it will be a new source pointing to the URL repository. Can I delete this sources after installed? Or will not be possible to update the add-ons after?
Another question, many repos has the same add-ons, but how about the versions?
Heather obviously you didn’t read instruction. You need to find repo url your self..
When I go to add koditips.com I hit done then I get unable to connect. Add it anyway? Do I hit yes or no or how do I fix this issue?
Façam um programa de legendas porque tem filmes que não tem legendas
Obrigado pela dica muito bom